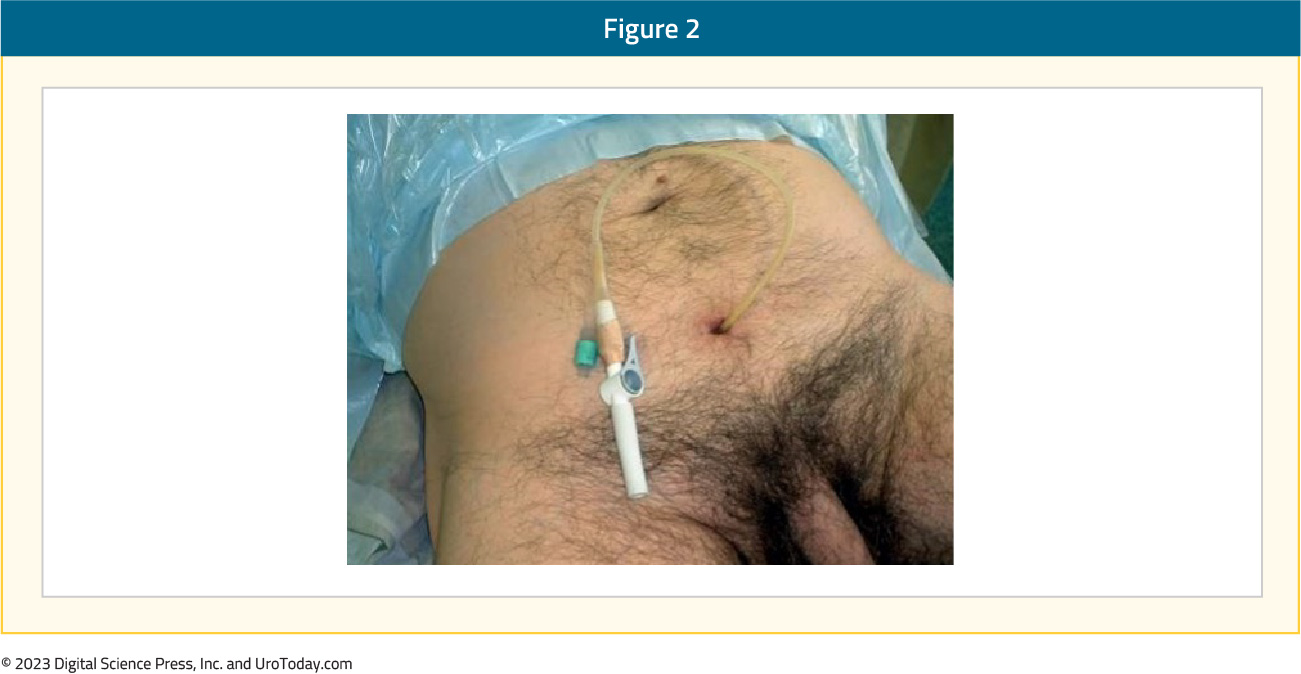
After the initial placement, a SPC does not require sutures to hold it in place as the catheter is secured in place by virtue of the fluid-filled inflated balloon, similar to an indwelling urethral catheter (IUC). Once a SPC is inserted, follow-up changes and care should include access to efficient and expert service for SPC monitoring and replacement as needed, and changing SPCs are integral to urology nursing practice.
Considerations for SPC changes
- The first SPC change after placement should occur at least 6 weeks after insertion to allow for epithelialized tract formation from the abdominal skin all the way to the bladder. These early changes should be performed by a clinician (usually a registered nurse, urology nurse, or advanced practice provider) who has expertise in SPC changes.
- Clinicians (e.g. nurses) undertaking a SPC change need to be skilled in removing and replacing the catheter without delay to avoid closure of the tract.
- SPC emerges at right angles to the abdomen and should be supported in this position with appropriate securement.
- The loss of the catheter track can occur during a catheter change as a result of the replacement catheter not being adequately advanced into the bladder so that the retaining balloon is inflated in the catheter track rather than in the bladder.
- A method to prevent loss of the catheter track is to partially fill the bladder with saline before changing, prior to catheter removal.
- Failure to reinsert a catheter during a catheter change should prompt immediate referral to the local urology service because track salvage may be possible using the instrumentation that is available in secondary care.
- According to a Cochrane review by Cooper et al (2016) and infectious disease guidelines by Gould and colleagues (2010), as is the case with IUCs, there is no evidence to recommend a set changing period for SPCs and similar to recommendations for changing IUCs, waiting till it is clinically indicated is the best practice. In certain cases, patients and caregivers are taught how to change the SPC.
- The use of antibiotics at the time of catheter change does not change the incidence of infection, so they are not recommended.
- Assemble all equipment before beginning procedure.
- Lighting as needed.
- Stoma cleansing items: disposable medical gloves, commonly used antiseptic solutions include: betadine, Hibiclens®, or Shur-Clens®.
- Bottle of sterile water, and 60 cc Toomey (piston) syringe
- Indwelling catheter insertion tray (e.g., all-in-one catheterization kit with a “closed or pre-connected, sealed catheter-tubing junction system” if available) includes sterile gloves, single use lubricant, indwelling balloon-retention catheter [14Fr or16 Fr [gauge] is preferred], Luer-Lok syringe pre-filled with sterile water [standard balloon size is 10 ccs inflated with 10 ccs], anchoring device for securing catheter, pre-connected urinary drainage bag or catheter valve if preferred.
- Consider having a second insertion tray or kit easily available if contamination occurs.
- If an all-inclusive catheter insertion tray is not available, alternative sterile equipment can be used but all parts must be sterile (e.g. gloves, single-use sterile lubricant packet, catheter, syringe pre-filled with 10cc sterile water for balloon inflation, drainage bag/valve, securement device).
- Only sterile water should be used to inflate the balloon as saline may crystallize the balloon port which would cause obstruction, preventing balloon deflation at time of SPC removal.
- If patient has been identified as having an allergy to Latex, use a 100% silicone catheter.
- The catheter size is usually larger than that used for a urethral insertion as a larger-size (bore) catheter may be useful to improve drainage.
Replacement or changing of a SPC is preformed using aseptic technique.
- Explain the procedure to the patient and obtain their informed consent.
- Ensure the patient’s comfort, privacy and dignity are maintained throughout the procedure, for example by closing the door and/or curtains and only uncovering the area necessary to access the catheter.
- Identify correct patient and explain the procedure.
- Provide as much privacy for the patient as possible.
- Perform hand hygiene and put on clean gloves.
- Raise bed and position lighting as necessary to provide adequate visualization of the lower abdomen.
- Assist patient into a comfortable supine position with legs extended and flat.
- Expose patient’s abdominal area only to ensure the SPC is accessible. Apply a sterile drape below the umbilical region.
- Remove anchoring device or tape.
- Inspect the catheter and remove any dressing in place. Assess the stomal opening and surrounding skin for signs and symptoms of infection, such as redness or drainage, and skin excoriation.
- A sterile dressing is normally placed following SPC insertion, which can be removed on healing within 7-10 days. Placing a dressing around the catheter after each change is optional and depends on patient preference and any weeping at the stomal site.

- Open sterile catheter insertion tray and have all supplies within easy reach. Squirt lubricant in tray, remove plastic cover from catheter and coat 1 – 2 inches of the catheter.
- Before beginning the SPC change, Yates (2016) recommends the clinician assess how the existing catheter is positioned, the angle of insertion and the length of catheter visible outside of body as a guide for replacement.
- To ensure correct insertion in the bladder, ensure that some fluid remains in the bladder by either clamp the catheter for a 15-30 minutes prior to removal or instill fluid by using a Toomey or piston syringe and instill 60 -100 mls of sterile saline through the existing catheter prior to removal. Leave the syringe connected to the catheter.
- Having residual urine/or sterile water in the bladder that drains once catheter is inserted can aid in correct replacement in the bladder.
- Deflate the balloon of the existing catheter through passive deflation.
- Check that the volume of fluid in the syringe is equal to the volume inserted to ensure balloon is completely deflated (may be less with a silicone catheter balloon that loses some fluid).
- Remove the catheter by placing fingers close to the skin and with your other hand grasping catheter firmly and gently pull steadily on the catheter in a slow, steady motion noting insertion distance. Discard removed catheter and bag away from sterile field.
- It may be necessary to gently rotate catheter to release any ingrowths in the catheter tract.
- The catheter balloon may have ridges or a cuff that remains around the catheter, hampering catheter withdrawal, and causing pain, discomfort or difficulty with removal of the catheter. This problem may be seen more commonly with all silicone catheters.
- Clean around the catheter site with a cleaning solution and sterile gauze or swabs, using an aseptic technique.
- Lidocaine gel or sterile lubricating gel can be applied into the tract
- Remove gloves and perform hand hygiene.
- Open sterile catheter tray (kit) (usually all supplies in a closed system catheterization kit are arranged in sequence of use). Using aseptic technique, don sterile gloves, prepare and drape the stoma area, assemble equipment (including drainage bag [check that clamp on drainage bag is closed] or catheter valve) within reach. Open outer package of catheter, remove catheter from protective sleeve while maintaining sterility of the catheter. Lubricate the tip of the catheter.
- Cleanse the stoma using aseptic technique with an antiseptic solution (e.g. Betadine, Hibclens). Discard cleansing swabs or cotton balls away from sterile field.
- Insert the new catheter by holding the catheter at a 90° angle and gently and slowly insert the catheter down the cystostomy tract to the distance judged from the catheter removed (usually 3-4 inches). Never force or insert roughly. It is normal to feel minor resistance at the stoma site and the catheter “pop” through the bladder wall.
- Advance the new catheter into the track so that the catheter “Y” junction touches the skin. Urine drainage should occur.
- Inflate balloon by instilling the correct amount of sterile water as under-inflation can result in balloon distortion, with the risk that the catheter may become dislodged.
- Correct placement can be confirmed by slowly advancing the catheter 3 cm and retracting the catheter 2 cm and feeling the balloon against the bladder wall. Using this technique, there is a risk that the catheter tip will have passed into the urethra. It is therefore essential that the balloon is inflated slowly and carefully.
- If there is any patient discomfort or resistance to gentle inflation, urethral passage should be suspected and the catheter withdrawn and reinserted.
- Catheter should be mobile within the bladder which can be determined by sliding the catheter a few centimeters into the bladder and then feeling for the balloon meeting the bladder wall as the catheter is gently withdrawn
- In women, visually inspect the urethral meatus to ensure that the catheter tip and balloon has not emerged from the urethra. If the catheter is in the urethra, the woman may complain of urinary urgency
- Connect the catheter to the appropriate drainage system or catheter valve.
- The use of a catheter valve as an alternative to continuous drainage is an option. Valves should not be used after prostate or bladder surgery as pressure caused by a distended bladder may lead to bladder perforation. Use of a catheter valve is most successful in patients with a bladder capacity > 300 mLs.


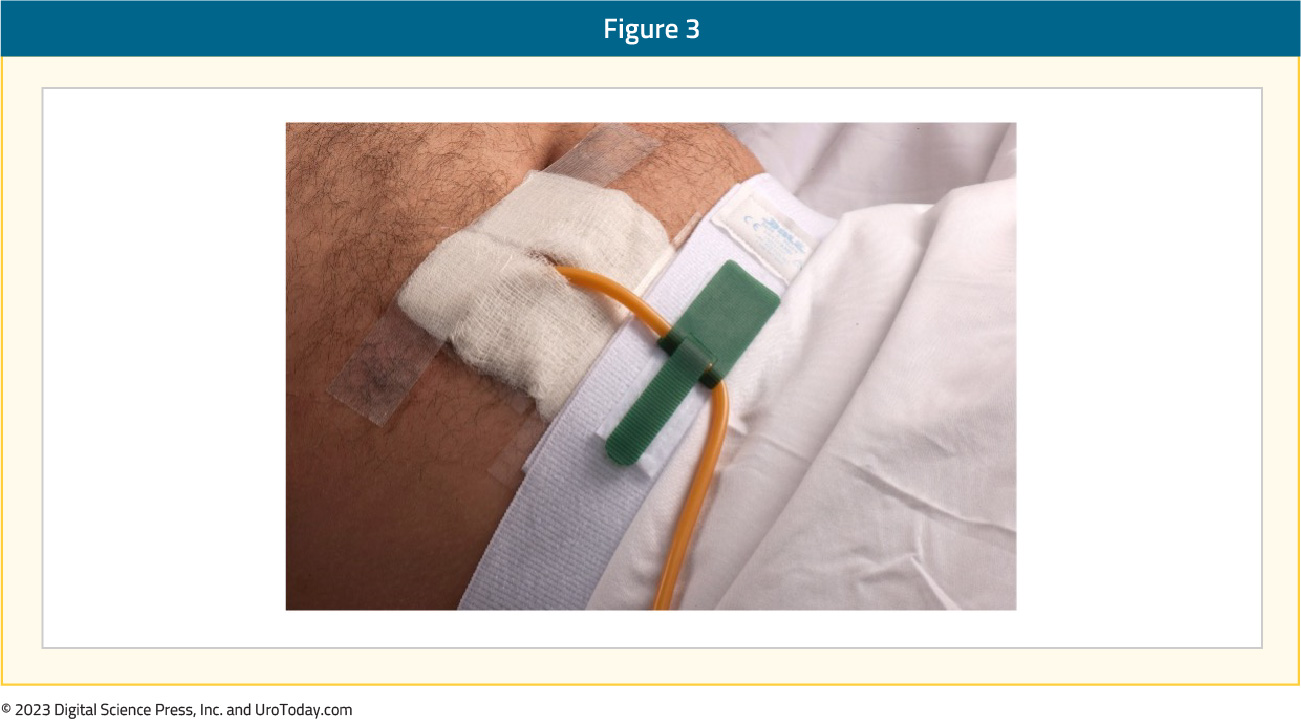
- Secure catheter to lower abdomen with a stabilization device to prevent erosion of the tract and to reduce trauma/traction being applied to the bladder neck and stoma. SPC secured with Velcro cloth abdominal strap
- When securing, do not pull catheter taut, rather allow room to insert 2 finger under the catheter.
- Discard supplies, remove gloves and perform hand hygiene
Instructions: Instruct the patient to clean the insertion site daily with warm water, unscented soap and a clean cloth, working around the catheter. The patient can shower daily as this will not harm the catheter. If there are any signs of redness, discharge, pain or hardness to the surrounding skin, contact the health care provider who changed the catheter. The use of dressings over the site or around the catheter at the insertion site may be used for cosmetic purposes. Do not use talcum powders or cream around the catheter or near the stomal tract as they can cause irritation to the skin.
Documentation: Documentation should include the reason for catheterization, date and time, catheter type (material and size), volume of water used to inflate the balloon, use of lidocaine, any problems encountered during procedure (i.e. resistance to insertion, bleeding at the insertion site, pain), the appearance of stoma site and skin integrity around the stoma, amount and description of urine drained, patient’s response to the procedure. Document education provided.
Written by: Diane K. Newman, DNP FAAN BCB-PMD, Urologic Nurse Practitioner, Adjunct Professor of Urology in Surgery, Senior Research Investigator, Perelman School of Medicine, University of Pennsylvania
References:
- Dawson, BC. (2021). How to change a suprapubic catheter effectively. Nurs Stand. 2021 Sep 1;36(9):63-66. doi: 10.7748/ns.2021.e11766.
- Sweeney, A. (2017). Suprapubic catheter change methods: A crossover comparison cohort trial. J Wound Ostomy Continence Nurs. 44(4), 368-373. https://doi: 10.1097/WON.0000000000000335.


